Tools you will need-a mallet,your stamp and SOAP of course
Milky Way Stamps are hard-this means a crisp, clean image.-(sorry for the slightly blurry pic)
I like to mark where the top is-it's not as big of a deal on rounds as it is on bars,however I like to look at the round and find the best/most aesthetically pleasing placement- so it does help to know the top.
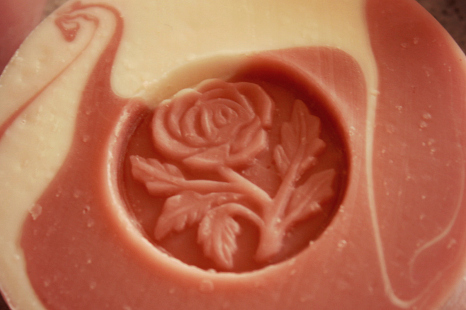
I've found that for this stamp I need to go a bit deep in order to get the details on the rose to show up
A nice clean stamped image
Stamps are a fun and easy way to add a special touch to your soap. I really like the Milky Way stamps-Bramble Berry carries a nice selection or you can even purchase them from Milky Way Molds. I found this Rose stamp on Etsy for a bit less than either supplier-so I snagged it.
Supplies you will need-
A GOOD STAMP
Why do I prefer Milky Way stamps? They are made of a resin like material that is hard-unlike a rubber stamp. This means that the image is more crisp and clear, edges are more pristine and not smashed. I also like the tall wood block,they all come that way and it makes it very easy to whack the stamp+miss your hand.
A MALLET-
I like a mallet to whack at my stamp because it has more surface area. I feel more secure like I am less likely to hit my hand. A hammer can damage the wood block.
LET'S GET STARTED-
Depending on your formula it's best to wait 24 hours or so after cutting your soap, so that it's not too soft. Stamping soap that is too soft will lead you towards certain disastrous results-you will end up with smashed soap. Wait a day or two for your soap to be hard enough to accept the stamp, but don't wait too long-this can cause your soap to split.
Start with a clean stamp,you can clean your stamp up with soap and water-(a brush is handy to scrub the soap boogers out of crevices.) Make sure there is no soap from previous stamping sessions in any of the cavities or on the edge of your stamp.Clogged cavities will cause the details not to show up on your finished image or cause cruddy edges.
Line up your stamp. I like to eyeball the alignment, however if you're very conscientious you can measure and find center. Make sure you are considering the "big picture" when you look at the placement for your stamp. Is this the prettiest side of the soap? Will this hide something critical-a beautiful part of the swirl etc. Line up your stamp to the best of your ability, and keeping your fingers away from the striking zone give the wooden block several good whacks. If you notice that one side seems deeper set give the opposite side a good whack or two to offset and even out the stamped area.Once you are satisfied you are relatively even within the soap-(be sure you're happy with it at this point because it's pretty impossible to place the stamp in the exact same spot to give it another whack or two)carefully lift your stamp from the soap. If the outer edges are a bit boogered up smooth them carefully with your finger-and there you have it a beautifully executed stamped image.


0 comments:
Post a Comment