April 28, 2012

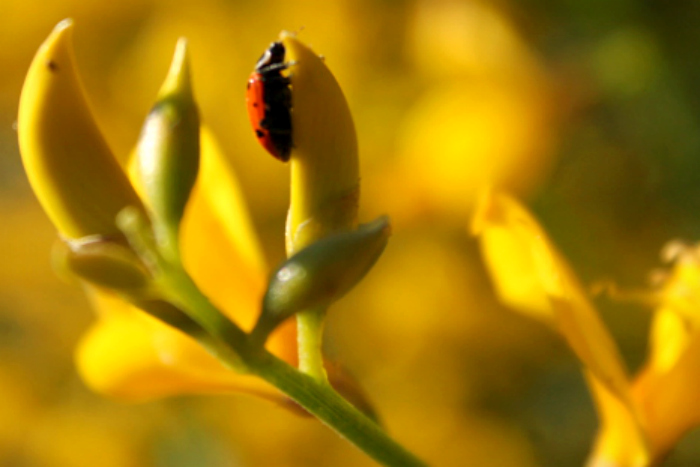
Flower Power


Please do not use images without written permission. Thank you!

April 27, 2012

Beautiful Photo Friday


From my walk this morning-aren't the colors fabulous?


I guess you've noticed not a whole lot of soapy stuff going on as of late. I'm taking some time to "fill the tank" so to speak. Playing with my camera and looking at the world around. This is another photo from my walk on Wednesday with a couple of today's thrown in.   Enjoy your weekend all!

April 25, 2012

Scenes from Today


I'm not really a "yellow" person,but is this the most lovely yellow you've ever seen?

Fun!


April 24, 2012

Here Comes the Sun

So, this past weekend (well part of Friday and Saturday to be exact) I attended a retreat intended specifically to provided tools for women and girls to assist them in leading a more congruent and empowered life.

One of the activities was yoga at sunrise. Yes, for those of you who know me it was pretty incredible that I was up that early, but boy am I glad I was. If you haven't taken the time to sit quietly (and seriously you could hear a pin drop amongst the chattering of birds, and the whinnying of horses-that's how amazing it was) you need to take the time out to do it you'll be glad you did. The location was outside of town in a slightly rolling, but open landscape where the horizon is 80% sky and 20% open plain, and just when you think the sun will never arrive you begin to see the first hint and then all too quickly the sun is up to announce a new day. What a sight, what an amazing experience-sitting in the chilled morning air a hot cup of tea in hand in bare feet so as to feel the earth beneath you. AMAZING! If you haven't taken the time to do this lately I highly recommend it. What a miracle that each day is new, a fresh new beginning, a "do over" if you will-a chance to move away from mistakes, bad days etc. or a vehicle to move towards goals and milestones.

April 22, 2012

Quote of the Day

"Happiness is when what you think,what you say, and what you do are in harmony."
-Ghandi

April 20, 2012

Beautiful Photo Friday

To go along with the "balm" theme and one of my favorite photos.

April 18, 2012

Anticipation

Wait for it...

Wait for it...

 Wait for it...

Whew! finally-in full bloom-it was worth the wait.

April 17, 2012

New! Sample Packs


I will be listing sample packs for sale tonight. Samples are a fun way to discover your favorite Tierra Verde Handmade Soap.Each sample pack weighs a minimum of 4.5 with most weighing between 4.5 and 5.5. Each pack varies and you never know what you're going to get-that's part of the fun! Each pack is tied with hemp twine and topped off with a decorative button or natural bead. Sample packs will sell for 6.00 each.

Sample Packs are now listed here.

April 14, 2012

Balm

Balm -n-

  1. Something comforting or soothing.
  2. any of various oily, fragrant, resinous substances, often of medicinal value, exuding from certain plants, especially tropical trees of the genus  
  3. an aromatic or fragrant ointment.
 I spent the day  yesterday making hand balms-I couldn't help but think about how the the process is a sort of balm in itself. Slowly melting beeswax and oils over the double burner-taking in the rich organic smell of beeswax (one of my favorite all time smells) is heavenly. The translucent golden elixir of melted oils is beautiful to behold and then it only gets better with the addition of a beautiful essential oil supplied by nature. The combined scent of beeswax and lavender wafting in the air as I pour the beautiful mixture carefully into each mold-it is therapeutic.

The following is a pictorial tour of the process. Enjoy!

 Beeswax and oils melting

Beautiful melted beeswax and oils ready to pour into molds

 Translucent goodness

 The liquid changes from translucent to opaque as it cools

I pop them in the freezer for just a bit to get even more firm

Getting ready to add the balms to tins and apply labels

Beautiful balms in their tins

Labels are applied and each tin is awaiting a shrink wrap seal to finish them out

April 13, 2012

Oh Bother..

It seems that my e-mail has been harvested by some sort of spam bot or individual who may use it for something less than admirable. I will be changing my e-mail ASAP. If you happen to get anything from a Tierra Verde e-mail please use caution opening any links. My contacts were not compromised-just my e-mail.
Thanks friends!

Beautiful Photo Friday


I love stones. Particularly river rock. I love the cool smoothness in my  hand and they way they gently warm the longer I hold them. I feel a soothing connection to the earth. Is it weird I keep some on my nightstand and pick them up daily to just hold them?

April 12, 2012

Re-Purposing


I just can't bare to fill up the landfill with even more plastic-what to do,what to do, with all those large oil buckets? Why, use them in the garden of course. We've been saving up our buckets for just this purpose. All you have to do is wash them thoroughly-we put a bit of sand in the bottom and melted any extra oil from the sides using a heat gun-the sand absorbs extra oil and then we thoroughly washed the inside of the bucket with a bit of dawn. Next, we drilled a few holes in the bottom for drainage and just like that, you have an awesome  portable vessel for garden plants-herbs, tomatoes, peppers and lettuce. You can easily clip lettuce to keep it baby and by putting a screen over the top keep pests out.

We even had enough buckets to secretly plant a few tomatoes for some friends who just haven't had time to get their garden up and going this year.(Shhhh, don't tell them.)

Oh,and if you're in Lubbock, and need plants to go with your re-purposed planter be sure to check out TG Trees Nursery and Garden Center at 11706 Frankford Ave. They have trees, herbs, bedding plants, annuals, perennials,beautiful bird baths(I've been lusting for one),hanging baskets, roses, house plants, rocks and boulders,insecticide, fungicides,pesticides all kinds of things to meet your gardening needs + Tierra Verde Handmade Soaps-Green Earth Gardener's Soap and All Natural Hand Balms too! Stay tuned, for the full post coming soon.

April 11, 2012

What I'm Working on Today


Packaging soap for the Lubbock Downtown Art Market this coming Saturday, April 14, 2012 from 9-3 at 19th and Buddy Holly. I hope it's a beautiful day-we so need it for market day. The weather was just not cooperative for the past two months in terms of an outdoor market.

Head on over for fresh produce, plants- art of all kinds-hand tooled leather, ceramics, glass, hand knit articles,amazing gourd art, and soap.

April 8, 2012

Scene from Today

An Iris in my yard getting ready to make it's  glorious appearance.

April 7, 2012

Black-Part 2

Both soaps contain charcoal-the soap in the foreground clearly didn't have enough charcoal to get it close to black-the second attempt in the background was exactly what I was going for.

So, here are the results of my attempts at Cleanse facial soap. The soap in the foreground is the first attempt. Remember, that I hadn't worked with charcoal in some time and needed to get my bearings on how much to use to get at the saturation that I was going for. Clearly I wasn't anywhere near black, however it's still a lovely color and is very useable-whereas if I had gone over with too much color-I would have had a soap that bled black all over.The soap in the background was the next attempt, and I went up a half teaspoon-this seems to be just the right amount.

I always test saturated colors by using an end piece so that I can see to what extent the lather is tinted. This lather did have a very subtle tint of gray, so subtle that I really only noticed it in the run off in the sink. I lean towards being a bit of a minimalist when it comes to color-often because I don't like to have my colors bleed or lather that is off color.

I always check saturated colors for signs of bleeding.

Cleanse-facial soap with charcoal and a light splash of lavender. 3.75 ounces $5.00

The finished product; Cleanse-facial soap with charcoal and a light splash of lavender. Charcoal draws out dirt and absorbs oil while Lavender contributes anti-microbial/anti-inflammatory properties. Cleanse will be ready the first week in May.


April 4, 2012

Making Progress


Now that I have my soap supplies all situated, it's time to work on the curing rack(so that maybe we can eat at the kitchen table.)lol!  Organizing soap supplies=moving supplies off of my curing rack thus freeing up space to use the curing rack for it's intended use. Woohoo! I love having a place for everything.

April 2, 2012

Black

It's been a long time since I pulled out the ol bamboo charcoal, but now that I'm no longer in a discombobulated state(read about my recent re-organization here)-it's very handy to get to things like my colorants.Yahoo! So today, I was in the mood to re-visit bamboo charcoal. A few years back I bravely ventured into the realm of bamboo charcoal and really haven't bothered to mess with it since. I'm not really sure why-maybe it was the hassle of getting it out prior to my recent re-organization of soap supplies.

Fleur de lis was my very first attempt with bamboo charcoal + anything resembling the elusive swirl.

Fleur de lis (2010)-by Tierra Verde Handmade Soaps- scented with Anise and a bit of Clove.

This time I tried something "safe" I guess you could say since I hadn't worked with charcoal in such a long time. Today, I decided to make a mild cleansing facial soap with bamboo charcoal and a light splash of lavender. 

 I added 1/4 tsp. of charcoal(for an almost 2# batch) directly to my oils + a small amount of lavender. That white speck is from my Coconut oil-sometimes there seems to be a bit of coconut meat included in the oil.

I added the charcoal straight into the oils-it's very fine and will disperse easily once I introduce the stick blender. I also went ahead and added my lavender since I won't lose it to a low flashpoint.

Charcoal mixture after emulsification

You'll notice the color is now a charcoal and not the true black that I was hoping for. I will see what it does once it's gelled. I chose to start at perhaps a bit of a lesser amount of charcoal than I needed because if you add too much charcoal it will bleed and you will have gray suds + a stained wash cloth. It's always best to start out with a bit less than you think you'll need and adjust up-this way the soap might not quite be the black you want, but still very useable without the messy gray lather and possible staining. 


Cleanse- facial soap with charcoal and a light splash of lavender.

I like a round facial soap because they are just so easy to handle esp. for smaller hands. Cut pics will come in a couple of days..

April 1, 2012

My "Little Corner" of the World

My "little corner" is quite literally a little corner of my little kitchen. My family is making a wee bit of a sacrifice in terms of space, so that I can have a semi dedicated area.

 My "little corner" of the world-notice the chair within just mere inches of the dresser-that's  how close the dinner table is to the dresser-seriously tight quarters.

I've been making soap for four years now and as any soap maker knows the equipment seems to multiply exponentially from the beginning. At first things are innocent enough- you need a few bowls, spatulas,scales,various molds,jugs of oils and eo's, and before you know it a bar cutter comes into your life-taking up a bit more space. Eventually you outgrow the jugs of base oils and move on to order,and subsequently find the need to store 50# pails of oils, 35# cubitainers, larger molds, a log splitter/planer, larger buckets to mix your batch in-and on and on. This is the way a passion quietly and insidiously takes over your life.

I'm quite happy to have this little semi dedicated space(and grateful that my family is willing to make the exception for me to have it.) Prior to this, I had supplies in the pantry, under the sink,on shelves in my bedroom and pretty much any cubbie hole I could find to store my "things" in. 

I realize the dresser is less than perfect-it's after all a garage sale find(meant to be a first furnishing type deal for my son-while in his apt.- he rejected it.) While aesthetically it lacks a bit, a few of the drawers need adjusting, it could use a coat of paint for a bit of stain, it's missing a pull or two-overall it's a great piece. This dresser was a quality piece in it's day-solid wood and sturdy with lots of drawer space and plenty of  flat surface on top making it perfect for supply storage and a small workspace. I actually managed to get probably 90% of my soap supplies into the drawers and it's holding all of my relevant equipment on top. It's a great option for those of you who like me can't quite swing a studio/dedicated workspace yet. 

This small bit of organization helps me feel so much better mentally. I had a very hard time being so discombobulated-I just couldn't function very well. It's a tremendous relief to have all my "toys" together, and in my eyes-the dresser is a beautiful thing. ;-))

The top surface holds my handmade log splitter/planer (a large cumbersome piece that is a necessity with a block mold), a bar cutter, block mold, mixing bucket, and pvc molds. Yay! I typically mix my batch over on the bar in the kitchen so, it's very convenient to pull what I need from the dresser and just carry it over to my workspace.I love my new space-it's sunny and bright and best of all everything is centralized now-no more running from one cubbie to another to find what I need to make a batch of soap.  Soap cures in a shelf unit in another room.*Just in case you're wondering the splitter/planer is not quite complete yet-it's useable as is but will eventually have two more wires to split the block all at once.

March 28, 2012

Scenes from Today

 Soap soldiers all lined up to get their "cure" on.

Just cut-the scent is UN-be-leivably delicious.

March 24, 2012

Today's Subject-Tips for Working with Honey + A Sale!

“Well," said Pooh, "what I like best," and then he had to stop and think. Because although Eating Honey was a very good thing to do, there was a moment just before you began to eat it which was better than when you were, but he didn't know what it was called.” A. A. Milne, Winnie the Pooh

Mmmmm honey, the anticipation of it's thick flavorful offerings-it's good for so many things-one of which is soap. There aren't many ingredients I won't sacrifice for the sake of soap; herbs, teas, beer-are all fair game. I have to admit though I have a soft spot for honey, as I measure out each deliciously fragrant spoonful of honey- I have to admit I'm a bit remorseful, wishing instead that I were enjoying it decadently drizzled on a delicious scone, or perhaps enjoying a touch in my morning tea. However, knowing it's extraordinary contributions to soap, and ultimately the skin-I willingly make the sacrifice.

Honey, like glycerin is hygrogropic meaning it attracts water-moisture to your skin leaving it soft and dewy throughout the day. Honey also boasts natural anti-oxidant and anti microbial properties along with a litany of other beneficial properties making it a perfect "food" for your skin.

On the downside, honey is notorious for being a bit troublesome to work with in terms of soap making, so I thought I would share with you a few tips that I have found that make it a bit easier for me. I use a fair amount of honey(1 tbs. per pound of oils) to make my Orange Honey Drizzle with Oats soap;a soap I've been making now for  probably a couple of years-it's my very favorite of all time and if I had to choose only one  soap to use from now on it would be this one-hands down. I love that it smells good enough to eat and even more importantly the way it makes my skin feel.

* I'd like to add a change right here-in the above paragraph I stated that I used 1tbs. of honey per pound of oils. Previous to switching to this mold I was using a silcone mold, and so I never experienced any sticking issues-the mold below is a transitional mold(a move up in batch size) that I just started using. I line with freezer paper and with this batch I experienced some sticking to the paper on the bottom of the block. I'm thinking the next batch I will pull back on the honey just a bit. I'm thinking  I might go 6tbs. to the 8 pounds of oils to see if the sticking issue is eliminated by a bit less honey. This is to say, that you might need to play around just a bit with your honey ratio as well to avoid overheating, sticking etc.
So here we go-

  • Working with honey can be a sticky,icky mess. I find that if I lightly coat my measuring cup+ tablespoon with vegetable oil the honey doesn't stick to my cup or spoon making things much easier to deal with. 
  • Secondly, if you've ever made soap with honey and thought it was all integrated only to find those caramel colored splotches in your finished product-you know how frustrating integrating honey can be. I find that adding just a bit of water to my honey and slightly heating it makes it much easier to fully integrate into my oils. I like to get my oils to emulsification first, then slightly heat my honey/water in the microwave-just so I can tell the honey is loosened and a bit watery and then I add it to my base oils being sure to stick blend a bit to get it nicely mixed in. Adding a bit of water to the honey is okay for me because I use a water discount anyway so adding a bit back does not make my batch too wet and it saves me the frustration of honey that does not get mixed into the batch well-so sad when that happens(and it has happened-thus these little tips.)
  • Also,when soaping with honey (a hot additive due to it's high sugar content) you need to be careful. I find that letting my lye get fairly cool(I tend to soap with my lye around 110 degrees Fahrenheit.) and my oils even cooler-works well for me. In my experience, soaping on the cooler (esp.with ingredients high in sugars) side is very key to avoiding cracking and even worse a volcano. This brings up an important tip-if you suspect you may have a volcano incident on your hands (with beer, wine, honey, coconut milk, goat's milk or anything with lots of sugars)-put your mold over a tray of some kind to catch the mess and watch your eyes as it can spew raw soap all over. I've never had a volcano happen, but know people that have and it is a a mess to be avoided. I have had cracking on top-a precursor to a volcano.
  • Avoid over insulation of your mold. I use a wood mold and while I used to insulate and still in the cooler months throw a light towel around my mold-I don't insulate at all in the warmer months. It's always important to consider the ambient temperature of your soaping environment.Ambient heat with an already hot batch equal trouble.
 I add a bit of water to my honey and heat this mixture slightly before adding it to my soap at emulsification. Notice how the honey/water is not thick, but a bit runny instead. This makes for a much easier and successful  integration of honey into your batch. Sorry for the less than clear image- I was trying to get this shot dialed in with one hand,hopefully you get an idea of the consistency of the honey here.

Freshly poured batch-the top is a little crazy,but I'm not overly concerned because the top will be trimmed. One of the challenges in working with honey is that it also attracts ash(due to it's hygroscopic nature)-by trimming the top I don't have to worry about this. I will cover this soap with the lid to the mold,but will not insulate.

This is a hot, hot batch of soap in the throes of gel-this is a very good example of gel for those who've never seen it before. Gel starts in the very core of the soap and works out-sometimes the corners(the coolest part of the mold) don't gel.

The finished product-Orange Honey Drizzle with Oats- A generous drizzle of aromatic Citrus Honey and Sweet Orange essential oil mingle with hand ground colloidal oats; this wholesome soap is like breakfast for your skin.

And because this is my very favorite soap and I would love to share it with you-please enjoy 10% off of Orange Honey Drizzle with Oats today through Tuesday.


Oh! and be sure to tell share YOUR  favorite tips for working with honey or perhaps your horrible volcano stories..

    March 23, 2012

    Beautiful Photo Friday


    Today's Beautiful Photo Friday features one of my favorite tools-my little Molcajete. A Molcajete is a stone tool, the Mexican version of the mortar and pestle. I use it often, especially for hand grinding my oats for Orange Honey Drizzle with Oats (featuring citrus honey,sweet orange essential oil and hand ground colloidal oats.) Why not just throw oats in the spice mill you ask? Well for two reasons 1) I enjoy the process of grinding the oats-it's meditative and adds a more personal touch 2) using the Molcajete allows me much more control over the texture I want my oats to have-I don't want to completely annihilate my oats to the point of oat flour. I do want oats that are not whole with a certain proportion of oat flour-a Molcajete is perfect for this. A Molcajete is a beautiful thing.